A Business blog is a fantastic way to engage with your customers and build yourself and your Business to be a trusted authority within your industry. When running a blog, the comments that readers leave can be great for stimulating debating on your Site or social pages and can provide you with some great ideas for improving your Business or your product offerings.
However due to the fact that it’s an open forum, you can be at risk of attracting trolls or even comments that would be better discussed in a private message to the Business Owner. For this reason, it’s very important to regularly check the comments you receive on your blog and to know how to moderate them. So here is a step by step guide on how you can moderate the comments on your WordPress site.
The first thing you need to know about moderating comments on WordPress is that all comments will have to be moderated before they go live, this protects the blog and allows you to control the comments that show up on the page. However, it also means that without you actively moderating your comments, none will show at all, which can sometimes be just as bad – you don’t want your loyal customers to think you’re ignoring them!

Step 1
To begin, sign into the backend of your WordPress Website. Click on the specific blog name that has comments you want to moderate, if you have more than one blog. Activate WordPress blog moderation in one of the following ways:
If you are activating a privately hosted WordPress.org blog and have an administrator go to "SiteAdmin." Then, have them click on "Options," go to "Blogs," and look for the "Awaiting Moderation" activation link. Click on the link. When you registered a new blog, your WordPress administrator may have also received an Email with this activation link.
If you are starting a hosted WordPress.com blog, go through the new blog registration process, and then go to your Dashboard. Click on the "Settings" tab and the "Discussion" option. Look at the options for "Other Comment Settings," and choose if the person commenting is required to fill out a name or email, or if they must be a WordPress member. Also, in the "Before a comment appears" section, click on "An administrator must always approve the comment," unless you want comments to go up without your approval. You can also decide whether WordPress should try to weed out spam comments.

Step 2
The next step requires you to choose your Email settings. To do this, go to your Dashboard and under the “Settings and Discussion” sections, you can choose if you want to receive Email alerts every time someone comments on your blog, or every time a comment appears in the "Comments" section of your Dashboard.
This is a good idea if you have infrequent comments, if you travel often, or you have created strict rules on commenting. You can also check a box that says you can reply to this comment via Email. If you are moderating a number of blogs, this is not recommended, because it may overload your Email inbox and leave you a little overwhelmed!

Step 3
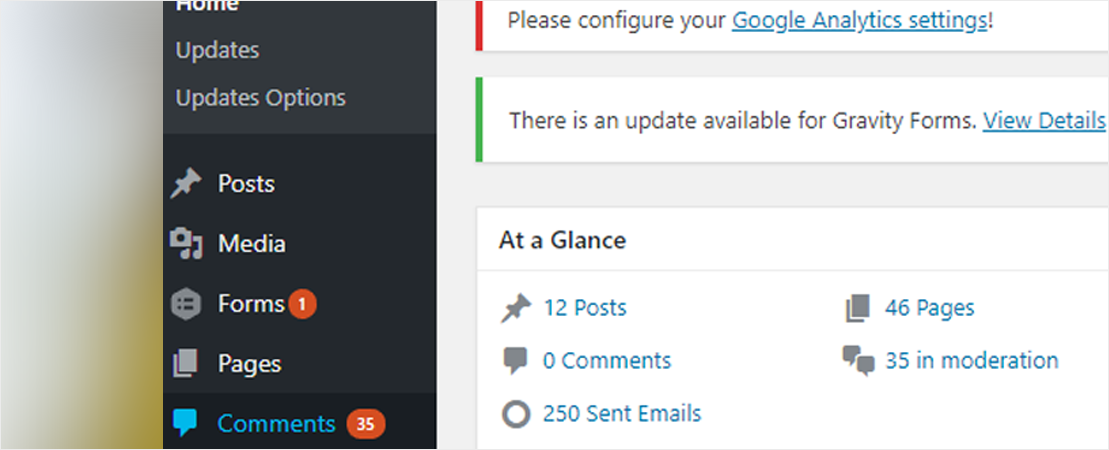
To moderate your comments, go directly to your Dashboard and click on the "Comments" section in your Dashboard list. This will take you to the page that holds all your comments awaiting approval. Above the list you can choose to see all comments, pending comments, spam, or trash.
Click on "Pending," to see all the comments that are awaiting your moderation. Hover over the comment with your cursor, and you will see options to approve, disapprove, mark as spam, or throw the comment in the trash. Choose the action that best fits the comment.
You can also choose to take a bulk action to your comments. You can click the box to the left of the comment. Click on the "Bulk Actions" drop down menu above and choose to approve, disapprove or delete (trash) all the selected comments. This will save time when dealing with many comments at once, especially to weed out spammers or approve comments from frequent readers.
If you mark something as spam once, all the comments from the same Email will be marked as spam.

Step 4
Download a desktop moderation application, if you use a privately hosted WordPress.org blog. If you manage many blogs or 1 popular blog, you may not have the time to log into the WordPress Admin section throughout the day. Choose a plugin to download onto your computer so that you can check on comments without using a web browser.
To do this, you can go to WordPress.org and click on the "Plugins" tab. Search for popular moderation plugins, such as DiscussIt Moderator. If you use Windows Live Writer, you can also choose a Windows Live Writer plugin that will create a page for your blog on your Windows Live Writer.
Check on the right-hand side to make sure your WordPress version and other system requirements are up to date, in order to run this plugin. Once you’ve downloaded the plugin, open the zip file on your computer, choose the "Plugins" section of your Admin Panel and this will activate the plugin.
The main thing to remember is that comments are a sign of engagement, so the more you have the better it is. People want to see reactions to the content on your blog and share experiences and opinions. So keep on top of your comments, check for comments regularly, add replies, answer questions, keep it positive and learn from the feedback you receive. After all, your services and products should be tailored to your customers, so listen to what they have to say and be part of the conversation!


